Customer reviews
US/UK/EU Ship VXDIAG VCX NANO for TOYOTA TIS Techstream V17.10.012 Compatible with SAE J2534 Free Shipping
US$95.00- Item No. SP245
- Free Shipping
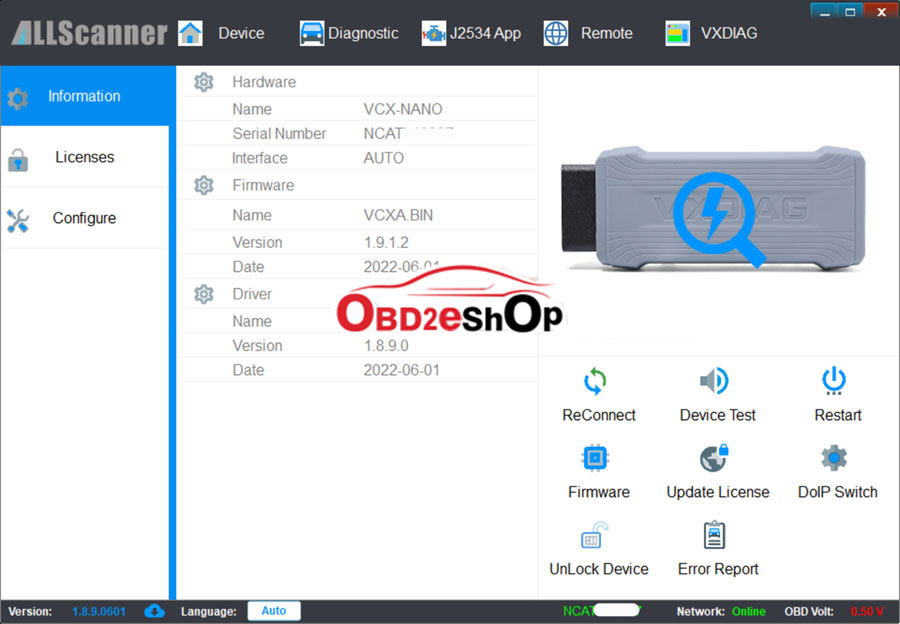
VCX is designed on the basis of the latest automotive international standards so that it can support many professional automotive diagnostic applications, including the original and third parties, it support original Toyota TIS Techstream software V15.00.02, can do diagnostic tests, programming matching, custom functions, the key matching, etc.
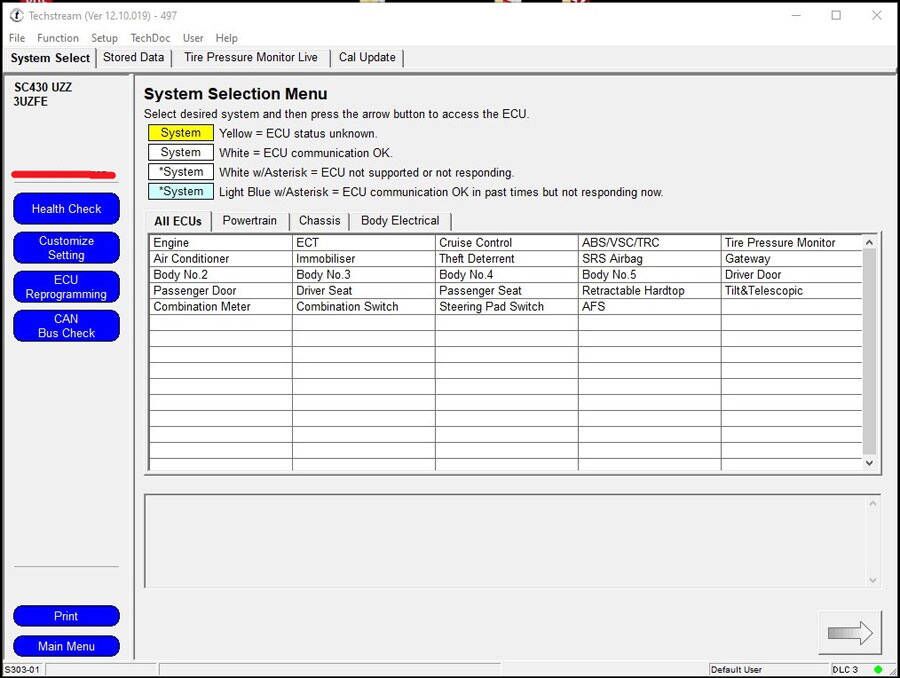
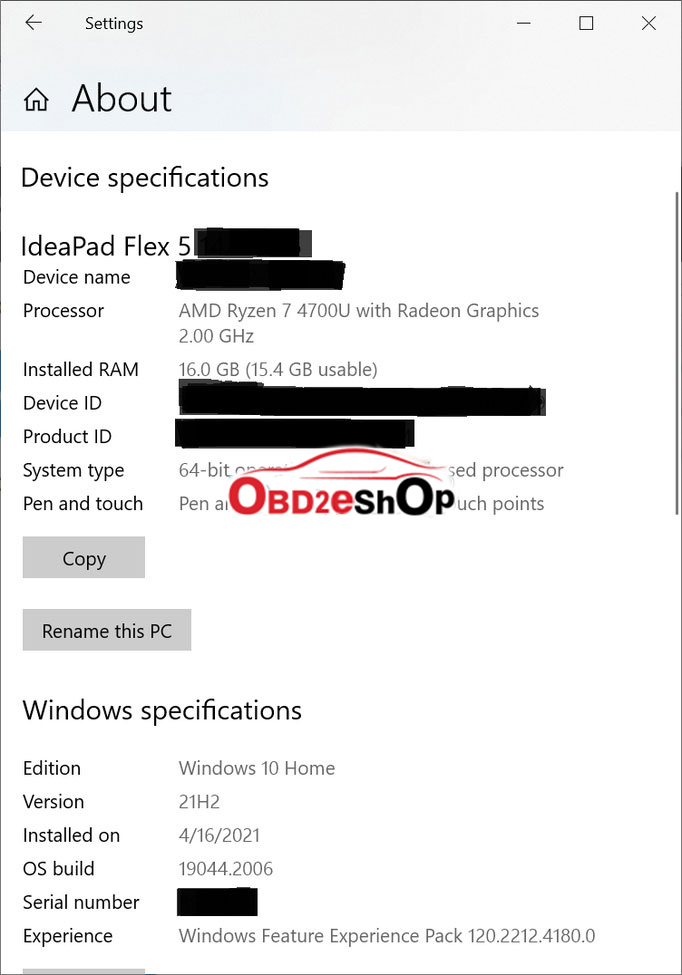
I use Toyota TIS Techstream ver12.10.019 on Windows 10 Home 64-bit on a fairly cheap 2020 Lenovo laptop. I connect to the Lexus SC430 using a VCX Nano PW880 ($95). I chose this unit because it can program the old TPMS sensors, while the cheaper under-$30 units cannot. I go to technical school and the $10k Snap-on standalone PC unit and a bunch of other handhelds couldn’t even read them, let alone program them. The school did have equipment that can detect signals from the sensors without interfacing with the car so I was able to find the two dead ones (but not their colors). After a lot of research I ordered the VCX Nano and it works great. Using it and Techstream I was able to turn off the yellowish daytime running lights and up the auto-relock time from 30 to 60 seconds. The car was always relocking itself before I could finish loading stuff in the trunk. To me, those two things alone were worth the cost of the unit. I also bought a 10-foot shielded USB cable for $6 off Amazon to make it easier to move the laptop around the car and a $10 pistol case to store the unit in.
I haven’t tried programming the new TPMS sensors yet because I’m waiting to transfer a good set of Michelins over to new rims in a couple weeks. The unit I bought didn’t come with the Toyota software (a lot of cheaper ones do) but you can find numerous versions of it on VXDiag’s website.
Before using Windows 10 natively, I tried using a VM-Ware image of Windows XP with TechStream 12.20.024 on it. It loaded fine but had no USB connectivity. The VCX nano will supposedly work over wifi as well as USB but that was just another step I didn’t want to mess with. I also tried every version of Techstream available from a notorious website whose logo is a ship sporting a skull and bones flag. None of them worked for me but I think that was because in the early stages of trying to get this to work, I wasn’t loading the PassThru app inside the VX Manager program.
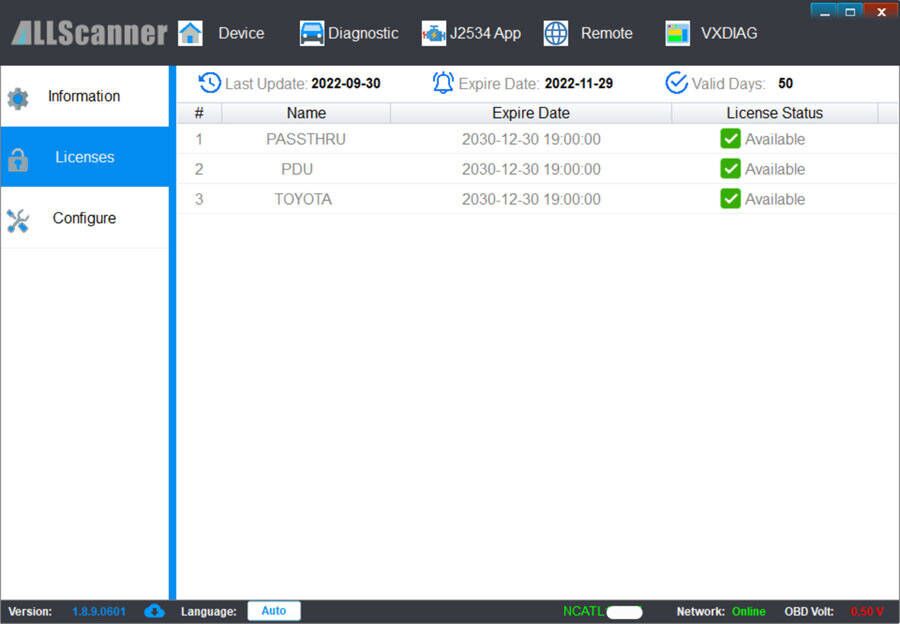
After a lot of trial an error, what worked for me (and reads color-coded TPMS) was Windows 10 x64 –> plug in VCX Nano –> load VX Manager (the software for the unit) –> from there, start the PassThru app –> start Techstream –> success! It also works on an Lexus RX350.
Good day.Thanks for your Visit
Hoping we can enter a long term business relationship together, thank you.
If you need any help, don't hesitate to contact us.
Whatsapp:+8618054815707
:-) Have a nice day.
Erin
I tried several cheap Mini VCI J2534 simulated USB cables (about $25 each) on Lexus LS460. I found that they could perform some basic Techstream functions but were often unreliable (lost communication, etc.) when performing more advanced functions such as programming TPMS sensors. Eventually, I settled with a VXDiag VCX NANO Toyota Techstream connector (about $89), which performed all the advanced Techstream functions that I needed to do. So, check your VCI/OBD2 interface and make sure that it can communicate with your car reliably and consistently.
I want to share my experience with the brake bleeding on my 2008 LS460 with 82K miles. I was doing this as maintenance and to get rid of the slight “squak” noise when applying the brake. I replaced all the fluids when I bought the car and this was the latest fluid to replace.
So prior to doing this job I did a LOT of research and reviewed the manual. The manual was unusually confusing so I decided to mostly follow the DIY instructions from forums.
The basics of the DIY were as follows:
1. Zero down accumulator
2. Disable EBD
3. Bleed front right
4. Bleed front left
4. Bleed right rear
5. Bleed left rear
6. Reset Memory
7. Relearn Linear Offset Memory
The manual listed the following for replacing only the fluid (no parts replaced)
1. Bleed front right
2. Bleed front left
3. Bleed rear
3. Disconnect accumulator connectors
4. Zero down
5. Disable EBD
Then while not listed you would presumably:
1. Reset memory
2. Relearn Linear Offset
BOTH of those procedures are wrong, especially IF you are just replacing the fluid. Here’s my ordeal.
I used the Techstream to select ABS/VSC/TRAC -> Utility-> Brake Bleeding -> Adjust Fluid Only -> All Lines
I followed the prompts and everything worked fine. The fronts were bled using my pneumatic bleeder and the rears were bled using my wife and the accumulator to push the fluid. Everything was good and I just needed to reset the memory and linear offset.
This is where I screwed up.
I noticed both the DIYs and manual both mentioning doing a zero down of the accumulator. So I decided I would reset the memory, zero down the accumulator, disable the EBD, and relearn the linear offset in that order.
This was mistake. The result was the accumulator pressure went to 0 (.45 V) and it was unable to build pressure as the accumulator wouldn’t turn on to pressurize the system. This resulted in a low pressure code (Code C1256) which caused linear offset learning to fail (Code C1345). Also as i tried to fix the issue, my battery voltage went low causing the tests to fail. I tried bleeding everything again using the “Adjust Fluid Only” and the EBD 2.0/2.5 Utilities and no fluid would come out of the rear brakes (either side). Jumping the battery and running the car for 30 minutes would see the accumulator pressure rise to 2.19 V (minimum threshold is around 2.4) and immediately go to 0 when the brake pedal was pressed. Nothing worked and I thought I damaged the accumulator or it failed during the bleed. I googled the code and tried numerous attempts to fix, which didn’t help.
I tried one last attempt at repair which worked perfect. I simply used the procedure for brake bleeding from “Actuator Replaced.” I followed the prompts which leads you to this procedure:
1. Bleed front right
2. Bleed front left
3. Bleed accumulator via right rear caliper
4. Bleed rear left
5. Bleed rear right
6. Disconnect accumulator connectors
7. Zero down accumulator, shut off ignition, turn on ignition, let accumulator run until it stops (builds pressure).
8. Repeat #7 four more times (total of five)
9. Reconnect accumulator connectors.
10. Reset memory
11. Relearn Linear Offset.
During step 3 it took nearly 3 full seconds for fluid to come out which means there was a TON of air. After this, all my codes cleared and everything worked PERFECT! Keep in mind that steps 3, 4, and 5 dump a LOT of fluid very fast. Because of my screw-up I ended up replacing over 75 ounces of fluid and totally flushed the entire system. Total cost was approximately $23, a few trips to the parts store (because I ran out of fluid twice while trying to solve the problem), and the cost of my time and sanity while I thought a $1500+ part had failed.
If I had just never done a zero down after my initial bleed, everything would have been fine.
Hopefully my experience can help someone who screws up like I did.
Toyota Techstream is required for brake bleeding on an LS460. Use the brake bleed utility under ABS/VSC/TRAC -> Utility-> Brake Bleeding and follow the prompts for your type of bleed exactly.
If replacing fluid only go to ABS/VSC/TRAC -> Utility-> Brake Bleeding -> Adjust Fluid Only -> All Lines
If bleeding after replacing a hard part or if you screwed up, go to ABS/VSC/TRAC -> Utility-> Brake Bleeding -> Actuator Replaced
If bleeding after replacing a sensor, go to ABS/VSC/TRAC -> Utility-> Brake Bleeding -> Stroke Sensor Replaced.
Good day.Thanks for your Visit
Hoping we can enter a long term business relationship together, thank you.
If you need any help, don't hesitate to contact us.
Whatsapp:+8618054815707
:-) Have a nice day.
Erin
Good day.Thanks for your Visit
Hoping we can enter a long term business relationship together, thank you.
If you need any help, don't hesitate to contact us.
Whatsapp:+8618054815707
:-) Have a nice day.
Erin
Good day.Thanks for your Visit
Hoping we can enter a long term business relationship together, thank you.
If you need any help, don't hesitate to contact us.
Whatsapp:+8618054815707
:-) Have a nice day.
Erin
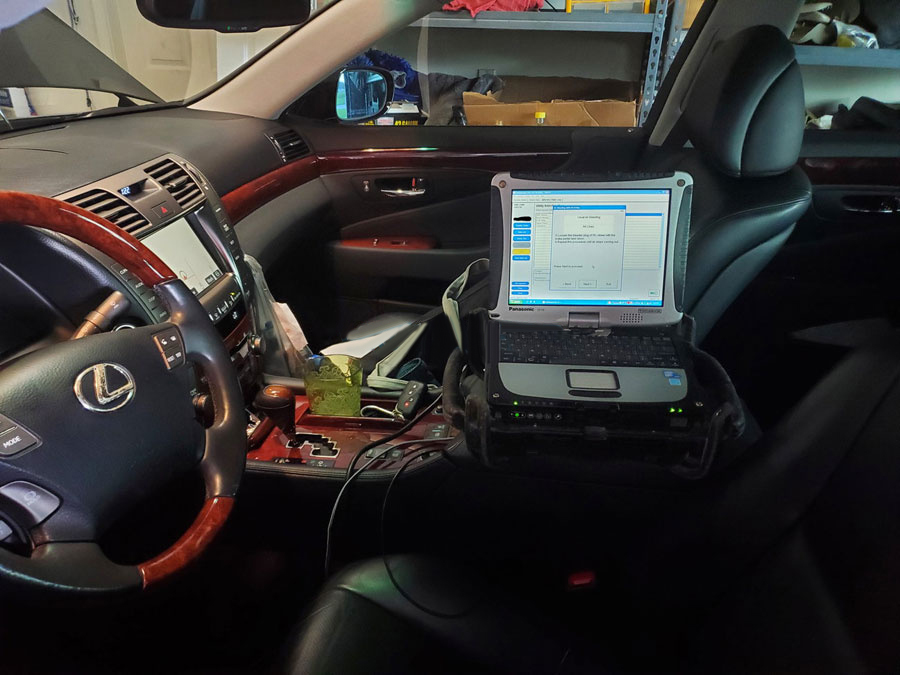
I put win10 32bit in an old HP computer and reused it as a diagnostic machine.
Along with that, the new GTS machine-vxdiag vcx nano toyota scan tool is purchased. I prefer software v16.
Thank you to those who have developed it.
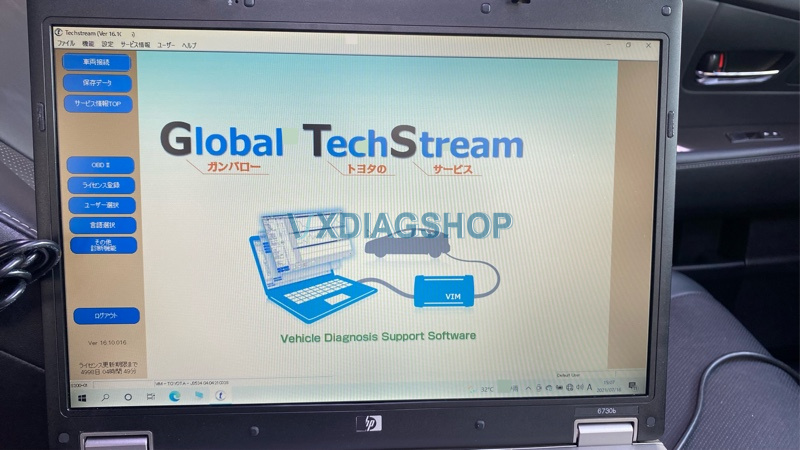
Now it can communicate with the Alphard HV.
You can also play with LEXUS as well.
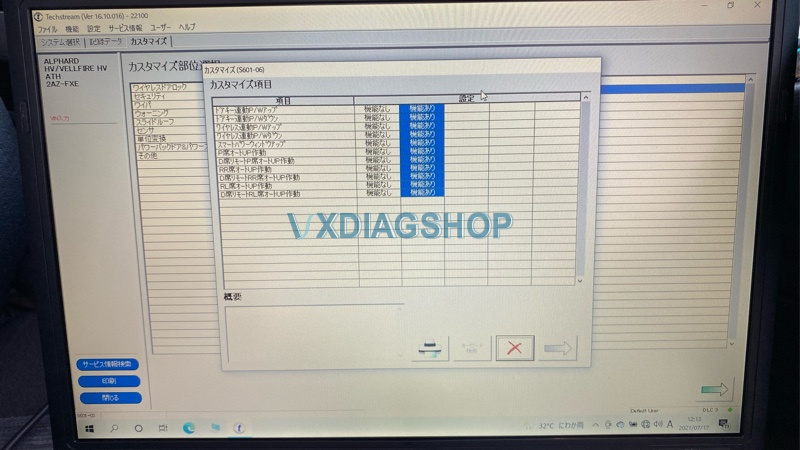
You can open and close the window with the smart key button. Why is this customizable? It would be nice to have settings from the beginning.
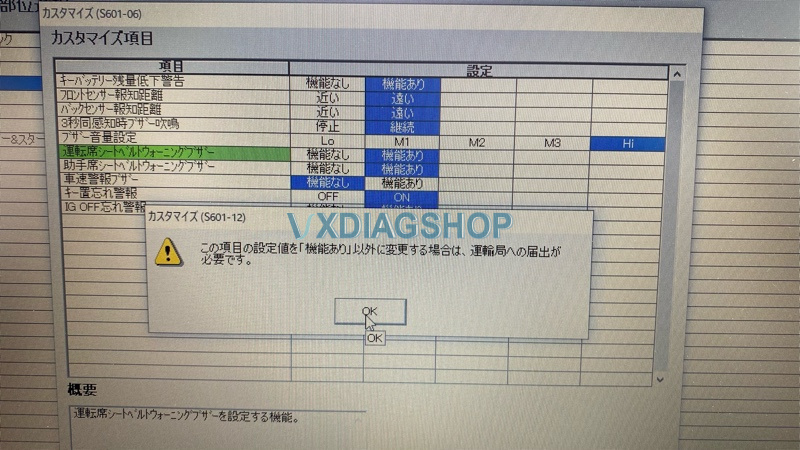
From here on, a lot of customized settings.
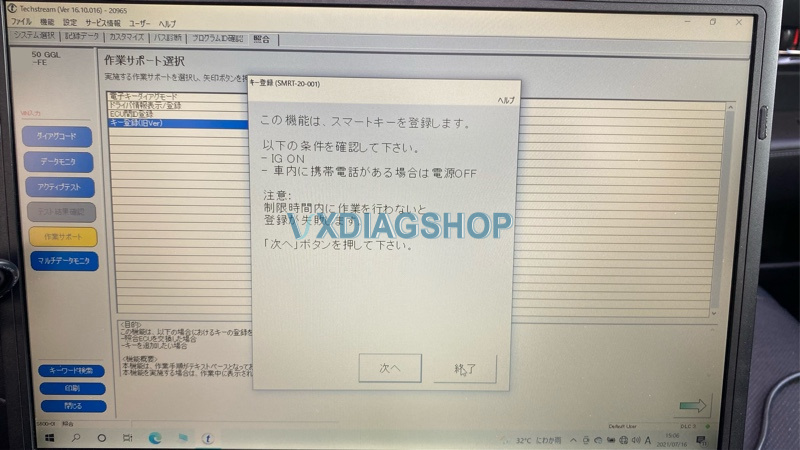
You can also register the key ~ You can buy a used one online and initialize it at a specialty store and reuse it. That’s it! Happy purchase.
Good day.Thanks for your Visit
Hoping we can enter a long term business relationship together, thank you.
If you need any help, don't hesitate to contact us.
Whatsapp:+8618054815707
:-) Have a nice day.
Erin
The following is our answer:
1.You can installed it in win8 or win 8.1 system as you you installed it in win 7.
2.If you there are any update version, we will send youthe link for updating.
3.There is not a time limit of the software.
Have any questions, free to text us.
Cathy
I NEED my order ASAP
WHEN are u shipping ?
thank you